Selecting an orthopedic implant for hand and foot surgery demands more than comparing sizes, prices, or product photographs. Small bones, narrow joints, tendons, and weight-bearing surfaces create different mechanical challenges. A plate that performs well in a metacarpal may not suit a first metatarsal. Patient age, bone quality, deformity, activity level, and healing risks must guide the decision.
This guide explains How to select orthopedic implants for hand and foot surgery through practical clinical considerations. It examines implant design, material strength, fixation methods, anatomical fit, and surgical handling. Surgeons should review peer-reviewed evidence, manufacturer instructions, sterilization requirements, and applicable medical-device regulations. A compact locking plate may help in fragile bone, while a low-profile screw can reduce irritation near thin soft tissue. Small details matter.
Fit comes first.
Experienced teams also consider imaging quality, available instruments, and postoperative care. A technically excellent implant can still create problems if the instrumentation is incomplete or follow-up is uncertain. That assumption can fail. No checklist is flawless. In practice, surgeons may need to balance ideal biomechanics with the patient’s anatomy, budget, and rehabilitation access. Discussions with trained orthopedic specialists and qualified implant suppliers can improve reliability, but commercial advice should never replace independent clinical judgment. The safest choice is usually the one supported by anatomy, evidence, surgical experience, and a clear plan for monitoring healing, alignment, infection, and hardware irritation. This article offers a structured starting point, not a substitute for patient-specific assessment.
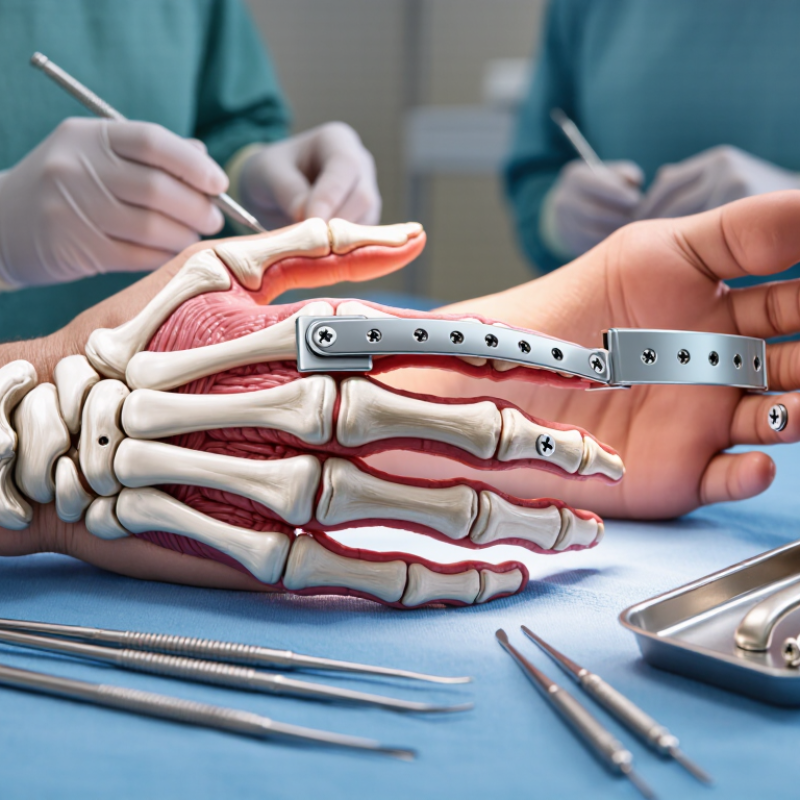
Implant selection should begin with the surgical objective, not a catalog. Is the goal pain relief, joint stability, deformity correction, or restored motion? The answer changes the design, fixation method, and material choice. The World Health Organization estimates that 1.71 billion people live with musculoskeletal conditions worldwide. That scale highlights a practical truth: anatomy and function vary widely between patients.
Measure the problem carefully. Radiographs reveal alignment and bone structure. CT may clarify joint surfaces, bone loss, or rotational deformity. Soft-tissue quality also matters, especially around the toes, ankle, and hand. A small implant can still fail when tendon balance, circulation, or loading patterns are ignored. A neat radiograph can mislead.
Patient risks must shape the plan. The International Diabetes Federation reported 537 million adults with diabetes in 2021. Diabetes may affect sensation, healing, and infection risk. Screen vascular status, glucose control, bone quality, and daily activity before choosing fixation. Consider work demands and footwear, not only the surgical image. In my experience, the “strongest” implant is not always the most suitable. I still question whether standard measurements capture every patient’s real movement. That uncertainty deserves discussion, documented consent, and a backup plan for difficult anatomy.
Tip 1: Define the surgical goal before comparing implants. Hand joints need precise motion, while foot procedures often demand stability and load control. One design rarely suits both.
Tip 2: Examine implant geometry against the patient’s anatomy. Use radiographs and, when necessary, three-dimensional imaging. Check angles, contact surfaces, and available bone stock. A small mismatch can irritate soft tissue. Fit matters.
Tip 3: Assess fixation carefully. Threads, pegs, fins, or press-fit surfaces should match bone quality and the planned surgical approach. Poor fixation may cause migration or delayed healing.
Tip 4: Select size from measurements, not visual preference. Trial components can reveal overhang, instability, or excessive joint tension. The smallest option is not always the safest.
Tip 5: Evaluate biomechanical function under realistic loading. Consider range of motion, joint stability, rotational forces, and stress transfer. In the foot, walking produces repeated cycles. In the hand, grip creates changing directional forces.
Tip 6: Protect surrounding tissues. Implant edges should avoid tendons, nerves, and thin skin. A technically stable implant can still create discomfort if its profile is excessive.
Tip 7: Review clinical evidence, surgical instructions, and follow-up requirements. Discuss choices within a qualified surgical team. A strong laboratory result does not guarantee identical patient outcomes. Personal anatomy, bone healing, and rehabilitation can change the result.
A perfect fit on paper may fail in practice. Recheck assumptions before final selection.
| Tip | Evaluation Dimension | Practical Selection Criteria | Relevant Hand and Foot Application | Biomechanical or Clinical Rationale | Key Checks Before Use |
|---|---|---|---|---|---|
| 1 | Match the implant to anatomy | Choose a design that follows the bone contour and preserves surrounding soft tissue. Review available options for narrow, short, curved, or anatomically contoured bones. | Phalanges, metacarpals, metatarsals, tarsal bones, and small-joint fixation. | An implant that fits the anatomy can reduce prominence, soft-tissue irritation, unnecessary contouring, and the risk of malalignment. | Compare implant geometry with radiographs or CT images; assess bone width, curvature, joint proximity, and soft-tissue coverage. |
| 2 | Select the correct size | Use the smallest implant that provides adequate stability and fixation. Confirm plate length, screw diameter, screw length, pin diameter, or component dimensions for the target bone. | Small-fragment fractures, osteotomies, arthrodesis, and corrective procedures in the hand and foot. | Oversized implants may cause prominence or weaken a small bone; undersized implants may provide insufficient mechanical support. | Measure bone dimensions, verify screw purchase, avoid joint penetration, and confirm that the selected size allows appropriate spacing between fixation points. |
| 3 | Evaluate fixation stability | Assess hole configuration, locking or non-locking screw options, thread design, purchase length, and the number and distribution of fixation points. | Fracture fixation, osteotomy stabilization, and fusion procedures where rotational control is important. | Stable fixation helps maintain reduction against bending, shear, torsion, and repetitive loading during healing. | Check cortical purchase, bone quality, screw trajectory, construct length, and whether fixation protects rather than obstructs the intended joint or tendon motion. |
| 4 | Match the construct to loading conditions | Consider whether the site is exposed mainly to compression, bending, shear, or torsion, and select a construct designed for the expected postoperative load. | Weight-bearing forefoot and hindfoot procedures versus relatively smaller-load hand procedures. | Foot implants may require greater resistance to cyclic weight-bearing, while hand constructs must also preserve tendon glide and fine motion. | Review patient activity, bone quality, expected rehabilitation, early loading plans, and the mechanical demands of the specific anatomical location. |
| 5 | Assess material and surface characteristics | Review the implant material, corrosion resistance, elastic behavior, surface finish, imaging compatibility, and documented biological performance. | Plates, screws, pins, wires, staples, and small-joint or fusion implants. | Material properties influence strength, stiffness, fatigue behavior, artifact on imaging, and interaction with bone and soft tissue. | Confirm regulatory clearance for the intended use, material compatibility, allergy history, imaging requirements, and any restrictions on mixing dissimilar metals. |
| 6 | Prioritize soft-tissue compatibility | Favor low-profile edges, smooth transitions, rounded contours, and a placement strategy that minimizes contact with tendons, nerves, vessels, and plantar or palmar skin. | Dorsal hand plating, extensor tendon regions, plantar forefoot procedures, and prominent bony areas. | Reducing prominence and friction may help limit tendon irritation, painful hardware, skin problems, and the need for later removal. | Evaluate soft-tissue thickness, tendon excursion, neurovascular structures, footwear pressure, implant edge position, and the need for countersinking or alternate placement. |
| 7 | Confirm procedural compatibility and follow-up needs | Select an implant system with suitable instruments, predictable insertion steps, reliable imaging visibility, and options for revision or removal when clinically indicated. | Primary fixation, revision surgery, staged reconstruction, and procedures requiring postoperative radiographic monitoring. | Instrument compatibility and clear visualization can support accurate placement, while follow-up access helps detect loss of fixation, nonunion, migration, or symptomatic hardware. | Review the surgical technique, instrument availability, sterilization requirements, postoperative imaging plan, rehabilitation protocol, and patient-specific risks. |
Note: Final implant selection should be based on the patient’s anatomy, diagnosis, bone quality, loading demands, surgical technique, and the implant’s approved indications, with clinical judgment applied by the treating surgical team.
Selecting an orthopedic implant for hand or foot surgery starts with the anatomy, not the catalog. Titanium offers high strength and relatively low density, while stainless steel can provide dependable rigidity at a lower cost. Bioabsorbable polymers may reduce permanent hardware, but their degradation can cause temporary inflammation. Material choice should match bone quality, load, soft-tissue coverage, and expected healing time.
Fixation method matters just as much. Screws can compress a fracture, plates can resist bending, and intramedullary devices may protect alignment through a smaller incision. However, a stronger construct is not always better. Excess stiffness may affect load transfer, especially in small bones. The surgeon should review pull-out strength, fatigue testing, and available clinical evidence. ASTM F543 supports standardized testing for metallic bone screws, while ISO 10993 guides biological safety evaluation.
Compatibility is often underestimated. Check screw threads, plate holes, instruments, imaging needs, and revision options before surgery. The World Health Organization reports that one in ten patients experiences harm during healthcare, with more than half considered preventable. Better documentation can reduce avoidable mismatches. The 2024 National Joint Registry covers over 3.5 million hip and knee procedures, offering valuable durability data, but it cannot directly predict hand or foot outcomes. That limitation matters. A perfect implant choice does not exist. Surgeons should combine registry evidence, manufacturer testing, patient-specific imaging, and practical surgical experience. Rethink assumptions when the evidence is indirect.
Selecting hand and foot implants demands more than catalog comparisons. Tip 1: Confirm regulatory status in the intended market. FDA reports receiving more than two million medical-device adverse-event reports annually. Clearance alone cannot prove long-term safety. Tip 2: Check the manufacturer’s ISO 13485 certification and audit scope. A certificate logo is not enough. Tip 3: Review ISO 14971 risk controls, ISO 10993 biocompatibility testing, and validated sterilization records under ISO 11135 or ISO 11137.
Tip 4: Request independent clinical evidence for the same implant design, material, and anatomical use. Hand and foot bones are small, but loading can be repetitive and severe. Tip 5: Inspect fatigue, corrosion, packaging, and mechanical-test data. ISO 11607 packaging validation matters before the sterile tray reaches the operating room. The World Health Organization reports surgical-site infection rates of about 2% to 5% in high-income settings, with higher rates reported in low- and middle-income countries. That makes sterile handling and packaging evidence practical concerns, not paperwork.
Tip 6: Evaluate traceability through lot numbers, unique device identification, complaint records, recalls, and corrective-action history. Tip 7: Ask how quickly the manufacturer supplies technical support, replacement components, and surgeon training. I would request raw test reports, not only polished summaries. No checklist is perfect. A supplier may appear reliable until a small production issue exposes weak communication or slow post-market response.
Selecting orthopedic implants for hand and foot surgery begins with the patient, not the catalog. Age, bone quality, activity level, swelling, and expected recovery all influence the decision. A manual worker may need durable fixation for repetitive loading. A frail patient may require a less demanding construct. Fit matters.
Surgical technique must guide implant choice. The surgeon should review imaging, bone shape, joint alignment, and the planned incision before choosing size and fixation method. Plate thickness can affect soft tissue comfort, especially around the toes or fingers. Screw length must support stability without entering a joint or irritating nearby tendons. In small bones, millimeters matter. Not always obvious.
Experienced teams also consider rehabilitation. A stable construct may support earlier movement, but excessive stiffness can restrict function. Implant flexibility, compression, and placement should match the procedure rather than follow a routine preference. Patient footwear, grip demands, circulation, and skin condition deserve attention too. A checklist helps, but it can hide uncertainty. When anatomy differs from the scan, the surgical plan may need adjustment. Careful templating, sterile handling, and documented follow-up improve reliability. The best choice is not necessarily the strongest implant; it is the one that fits the patient, anatomy, and technique with the fewest avoidable compromises.
Match implant selection to patient needs and surgical technique
The chart compares representative elastic modulus values used when considering implant stiffness. Cortical bone commonly ranges from approximately 7–30 GPa, titanium alloys from 100–120 GPa, stainless steel from 190–200 GPa, and PEEK from about 3–4 GPa. Actual performance depends on implant geometry, fixation method, loading conditions, and patient anatomy.
Start with the surgical goal. Pain relief, stability, deformity correction, and restored motion need different designs. Anatomy leads.
Radiographs show alignment and bone structure. CT can clarify joint surfaces, bone loss, and rotational deformity. Soft tissues also matter.
Tendon balance, circulation, bone quality, and loading patterns affect results. A clean image may hide functional problems. Measure carefully.
Healing risks, sensation, circulation, and glucose control should be reviewed. Work demands, footwear, grip use, and activity levels also matter.
Titanium offers strength with relatively low density. Stainless steel provides rigidity. Resorbable polymers may reduce permanent hardware but can cause temporary inflammation.
Screws can compress bone. Plates resist bending. Intramedullary devices may protect alignment through smaller incisions. More stiffness is not always better.
Confirm screw threads, plate holes, instruments, imaging needs, and revision options. Small mismatches can create avoidable problems. Check twice.
Review bone shape, alignment, incision location, and nearby tendons. A screw must provide stability without entering a joint. Millimeters matter.
Often, yes. However, excessive stiffness may restrict function or alter load transfer. Rehabilitation plans should match the construct and procedure.
No. The best option fits the patient, anatomy, technique, and expected loading. I still question whether standard measurements capture every movement.
Selecting the right implant is essential for achieving stable fixation, restoring function, and supporting a smooth recovery in hand and foot surgery. How to select orthopedic implants for hand and foot surgery begins with clearly defining the surgical goals and understanding the patient’s anatomy, bone quality, joint condition, and expected activity level. The implant’s design, size, shape, and biomechanical function should match the treatment site while preserving natural movement and minimizing stress on surrounding tissues.
Surgeons should also compare material properties, fixation methods, and compatibility with other instruments or implants used during the procedure. Safety certifications, quality control, clinical reliability, and manufacturer support are important factors when assessing implant options. Finally, selection should be tailored to each patient and integrated with the surgeon’s preferred technique, ensuring the implant can be positioned accurately and used effectively throughout the operation. A careful, individualized approach helps improve surgical confidence and supports dependable long-term outcomes.

KaiSo Medical